A Quick Example of Creating a Chocolatey Package
With the new school year and a gaggle of “virtual learning” children in the home, I’ve been spending a lot of time rebuilding and repurposing laptops lately. What was previously an awful, time-consuming process has been pretty simple by using tools such as Puppet Bolt and Chocolatey.
One of the questions I get a lot on the job is from users that have not heard of Chocolatey or are not sure how to get started with their own packaging efforts. So, since I ran into an incidence of an app I use for recipes not having an actual chocolatey package available on the public feed, I thought I’d at least document the process for future generations.
Prerequisites
-
You should have chocolatey installed on your Windows machine.
-
You should have the MSI/EXE of the application you want to install on your machine.
-
You should have a code editor. I use Visual Studio Code in these examples.
-
Have a powershell prompt open, preferably as Administrator.
-
Right now I’ll show you how to install the package locally. You’ll need your own repository to share with other machines, which I’ll go into on the next blog post.
-
You should be preferably be listening to some late 70s classic rock. It just feels right for chocolatey packaging.
Steps
-
For these examples, the app I’ll be packaging is Paprika, a recipe manager I highly recommend if you are way into managing your recipe collection across Windows, Mac and mobile devices. I have downloaded the application to my
Downloadsfolder. -
Create a new chocolatey project. From the powershell prompt, create a new chocolatey project by typing
choco new paprika, or your app of choice. In the example I’m just hanging out in the Downloads directory, but if you are doing this for work I’d suggest creating a dedicated chocolatey code folder where you can store these projects and check them into version control.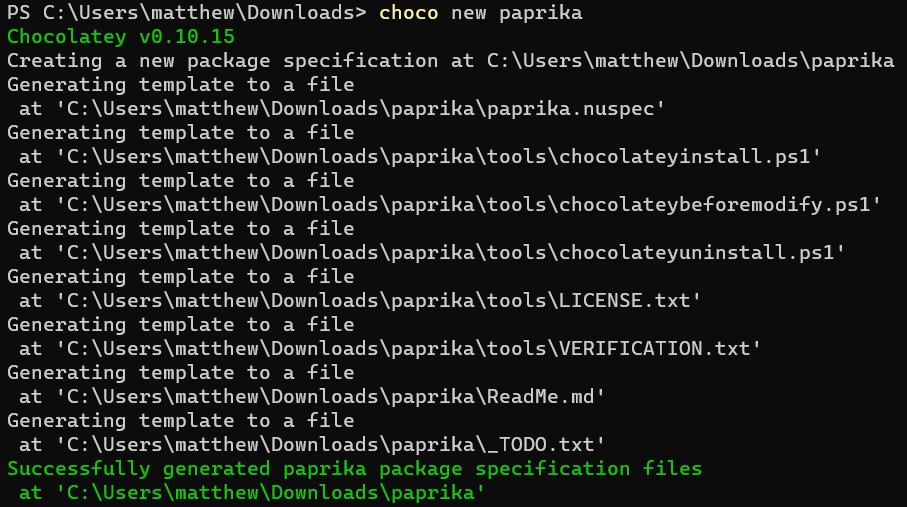
-
Now that the project has been created, we have a lot of filling in the blanks to do. Let’s start by opening our project in Visual Studio Code. In the example, from the powershell prompt type
code paprikato load VS code and the project folder automatically. -
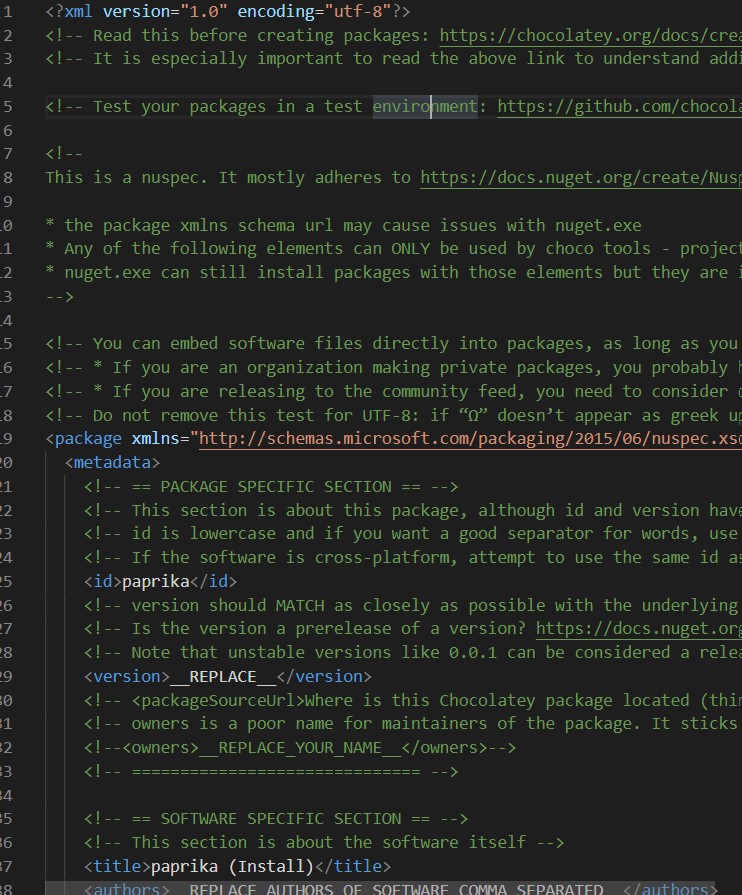
Since this is a quick and easy example, let’s select and remove all the comments. Anything that starts with a
<!--can go. Here’s a before and after pic:BEFORE
AFTER
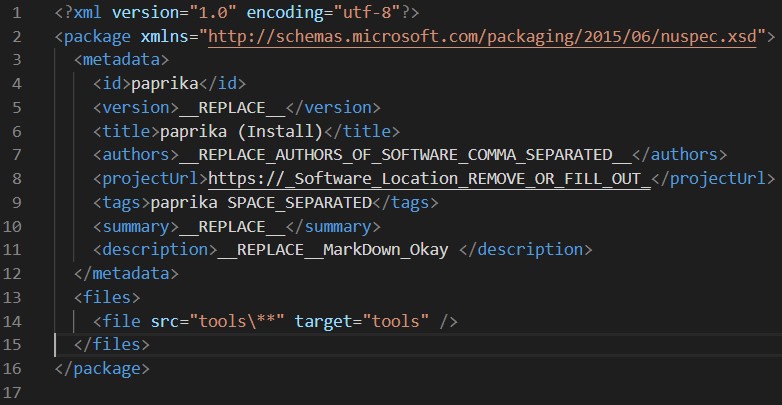
- Now that we’ve cleaned it up, let’s put the right information into the box.
<?xml version="1.0" encoding="utf-8"?> <package xmlns="http://schemas.microsoft.com/packaging/2015/06/nuspec.xsd"> <metadata> <id>paprika</id> <version>3.0</version> <title>Paprika</title> <authors>Matthew Stone</authors> <projectUrl>https://paprikaapp.com</projectUrl> <tags>paprika paprikaapp</tags> <summary>Install Paprika Recipe Manager</summary> <description>Install Paprika Recipe Manager</description> </metadata> <files> <file src="tools\**" target="tools" /> </files> </package> -
The last bit it to get the installation logic into the package. We do this two ways. The first is to get the MSI install information. We do this by running the installer with the
/?flag. This will display all the flags we will use inside the choco package to create a silent installer.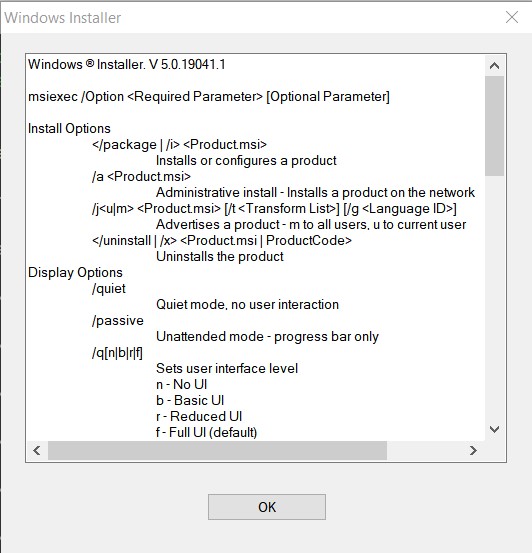
from this example, a nice
/quiet /qnshould suffice. - Let’s open the install script. Navigate to the
tools/chocolateyinstall.ps1file in Visual Studio Code and take a look. Again, I’ll remove the comments from the file for example purposes, and contemplate a blog post of how to use templates to make this a much cleaner process in the future.
By the way, those comments are extensive and cover just about every scenario you can imagine, so if you have a package that doesn’t find the mold of this example, read the comments and links to documentation for a better understanding.
- Let’s walk through what’s left of the file:
$ErrorActionPreference = 'Stop'; # stop on all errors
$toolsDir   = "$(Split-Path -parent $MyInvocation.MyCommand.Definition)"
$url        = '' # download url, HTTPS preferred
$url64      = '' # 64bit URL here (HTTPS preferred) or remove - if installer contains both (very rare), use $url

$packageArgs = @{
  packageName   = $env:ChocolateyPackageName
  unzipLocation = $toolsDir
  fileType      = 'EXE_MSI_OR_MSU' #only one of these: exe, msi, msu
  url           = $url
  url64bit      = $url64
  softwareName  = 'paprika*' #part or all of the Display Name as you see it in Programs and Features. It should be enough to be unique

  checksum      = ''
  checksumType  = 'sha256' #default is md5, can also be sha1, sha256 or sha512
  checksum64    = ''
  checksumType64= 'sha256' #default is checksumType

  silentArgs    = "/qn /norestart /l*v `"$($env:TEMP)\$($packageName).$($env:chocolateyPackageVersion).MsiInstall.log`"" # ALLUSERS=1 DISABLEDESKTOPSHORTCUT=1 ADDDESKTOPICON=0 ADDSTARTMENU=0
  validExitCodes= @(0, 3010, 1641)
}

Install-ChocolateyPackage @packageArgs # https://chocolatey.org/docs/helpers-install-chocolatey-package
-
First, I’ll add the download link for the installer to the
urlandurl64values. “But Matt, I downloaded the installer” you say? Well, yeah, we need to gather info from it like the install logic and the checksum, and yes, you can bundle the installer and the file into the same package. I don’t if I can help it. I find it easier to ship a tiny package file that calls to external resources to get the job done. If your environment is offline, well, I’ll cover that in a another post. Since there’s only a single installer instead of x86/x64 versions, I’ll use the same link in both fields. -
Now let’s focus on the
$packageArgshash. First, changefileTypeto reflect the type of installer file you have, in this caseMSI. -
Last up, the checksum. Chocolatey can compare this so if the version changes or the binary changes and the checksum doesn’t match it will fail the install. To get the checksum run
Get-FileHash path_to_binaryfrom your PS prommpt, in this caseGet-FileHash paprikasetup.msi. Copy the results of theHashfield into its respective place here -
The silent args are exactly what we need, so we’ll just leave it at that. Save the file!
-
Let’s package it. From your PS prompt, enter the paprika project directory and run
choco pack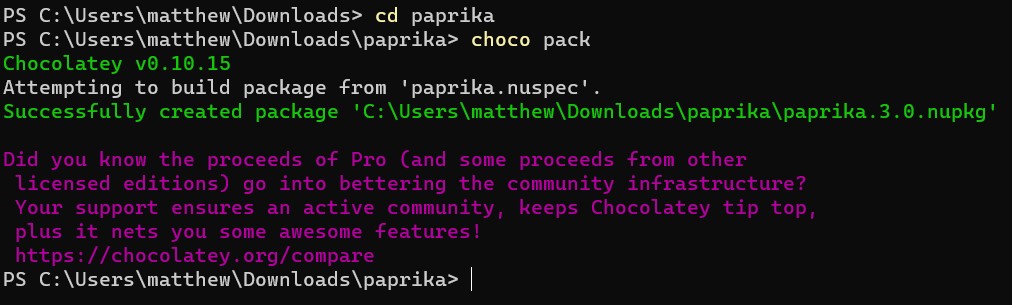
if everything hit correctly, you should now have a
nupkgfile in the root of the project folder. This is the package. -
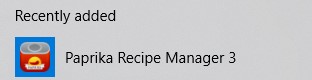
Let’s try installing our new package! Run
choco install ./paprika.3.0.nupkg. HitYat the confirmation prompt. You should then see the file being downloaded, checksum being compared, and a confirmation the application has been installed. -
Clicking on the Start Menu, I can now see my installed application.
-
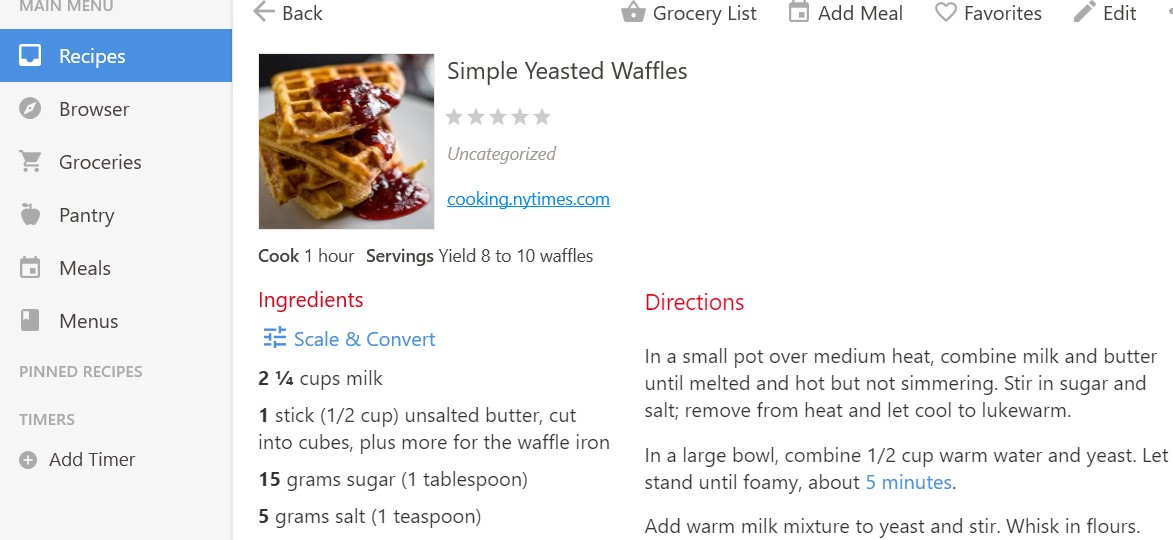
Result! Now I can make waffles.
Wrap-Up
In retrospect, quick might not be the word I would use, but the first couple of times you do this it takes a bit. Honestly, I haven’t had to do this for work reasons in forever, so running through the process took me about 15 minutes or so as well.
One you get the hang of this, though, it’s super quick. Combine custom templates and your own repository and creating a package is a pretty fast and easy process.
When you evaluate the free and business versions of chocolatey, one of the big pros of the paid versions is that all the above steps can be solved by simply right-clicking the MSI and selecting Create Chocolatey Package. If that sort of thing is your bag, I highly suggest checking out the paid versions and all the additional features to make managing this stuff at scale a simpler process.
Now, we still have work to do, such as storing this package in a repository and deploying the package across several systems. Well, maybe I don’t need a recipe app on all my systems but you can see how beautiful this process would be with something like deploying Visual Studio Code or Zoom.